
QC Results
Create QC reports to track vendors’ failure rates for delivering the correct file specs when they receive assets and collect metrics on vendors, assist in potentially penalizing repeat offenders who repeatedly make the same mistakes when delivering, and reclaim the time lost to back-and-forth communication to receive good files.
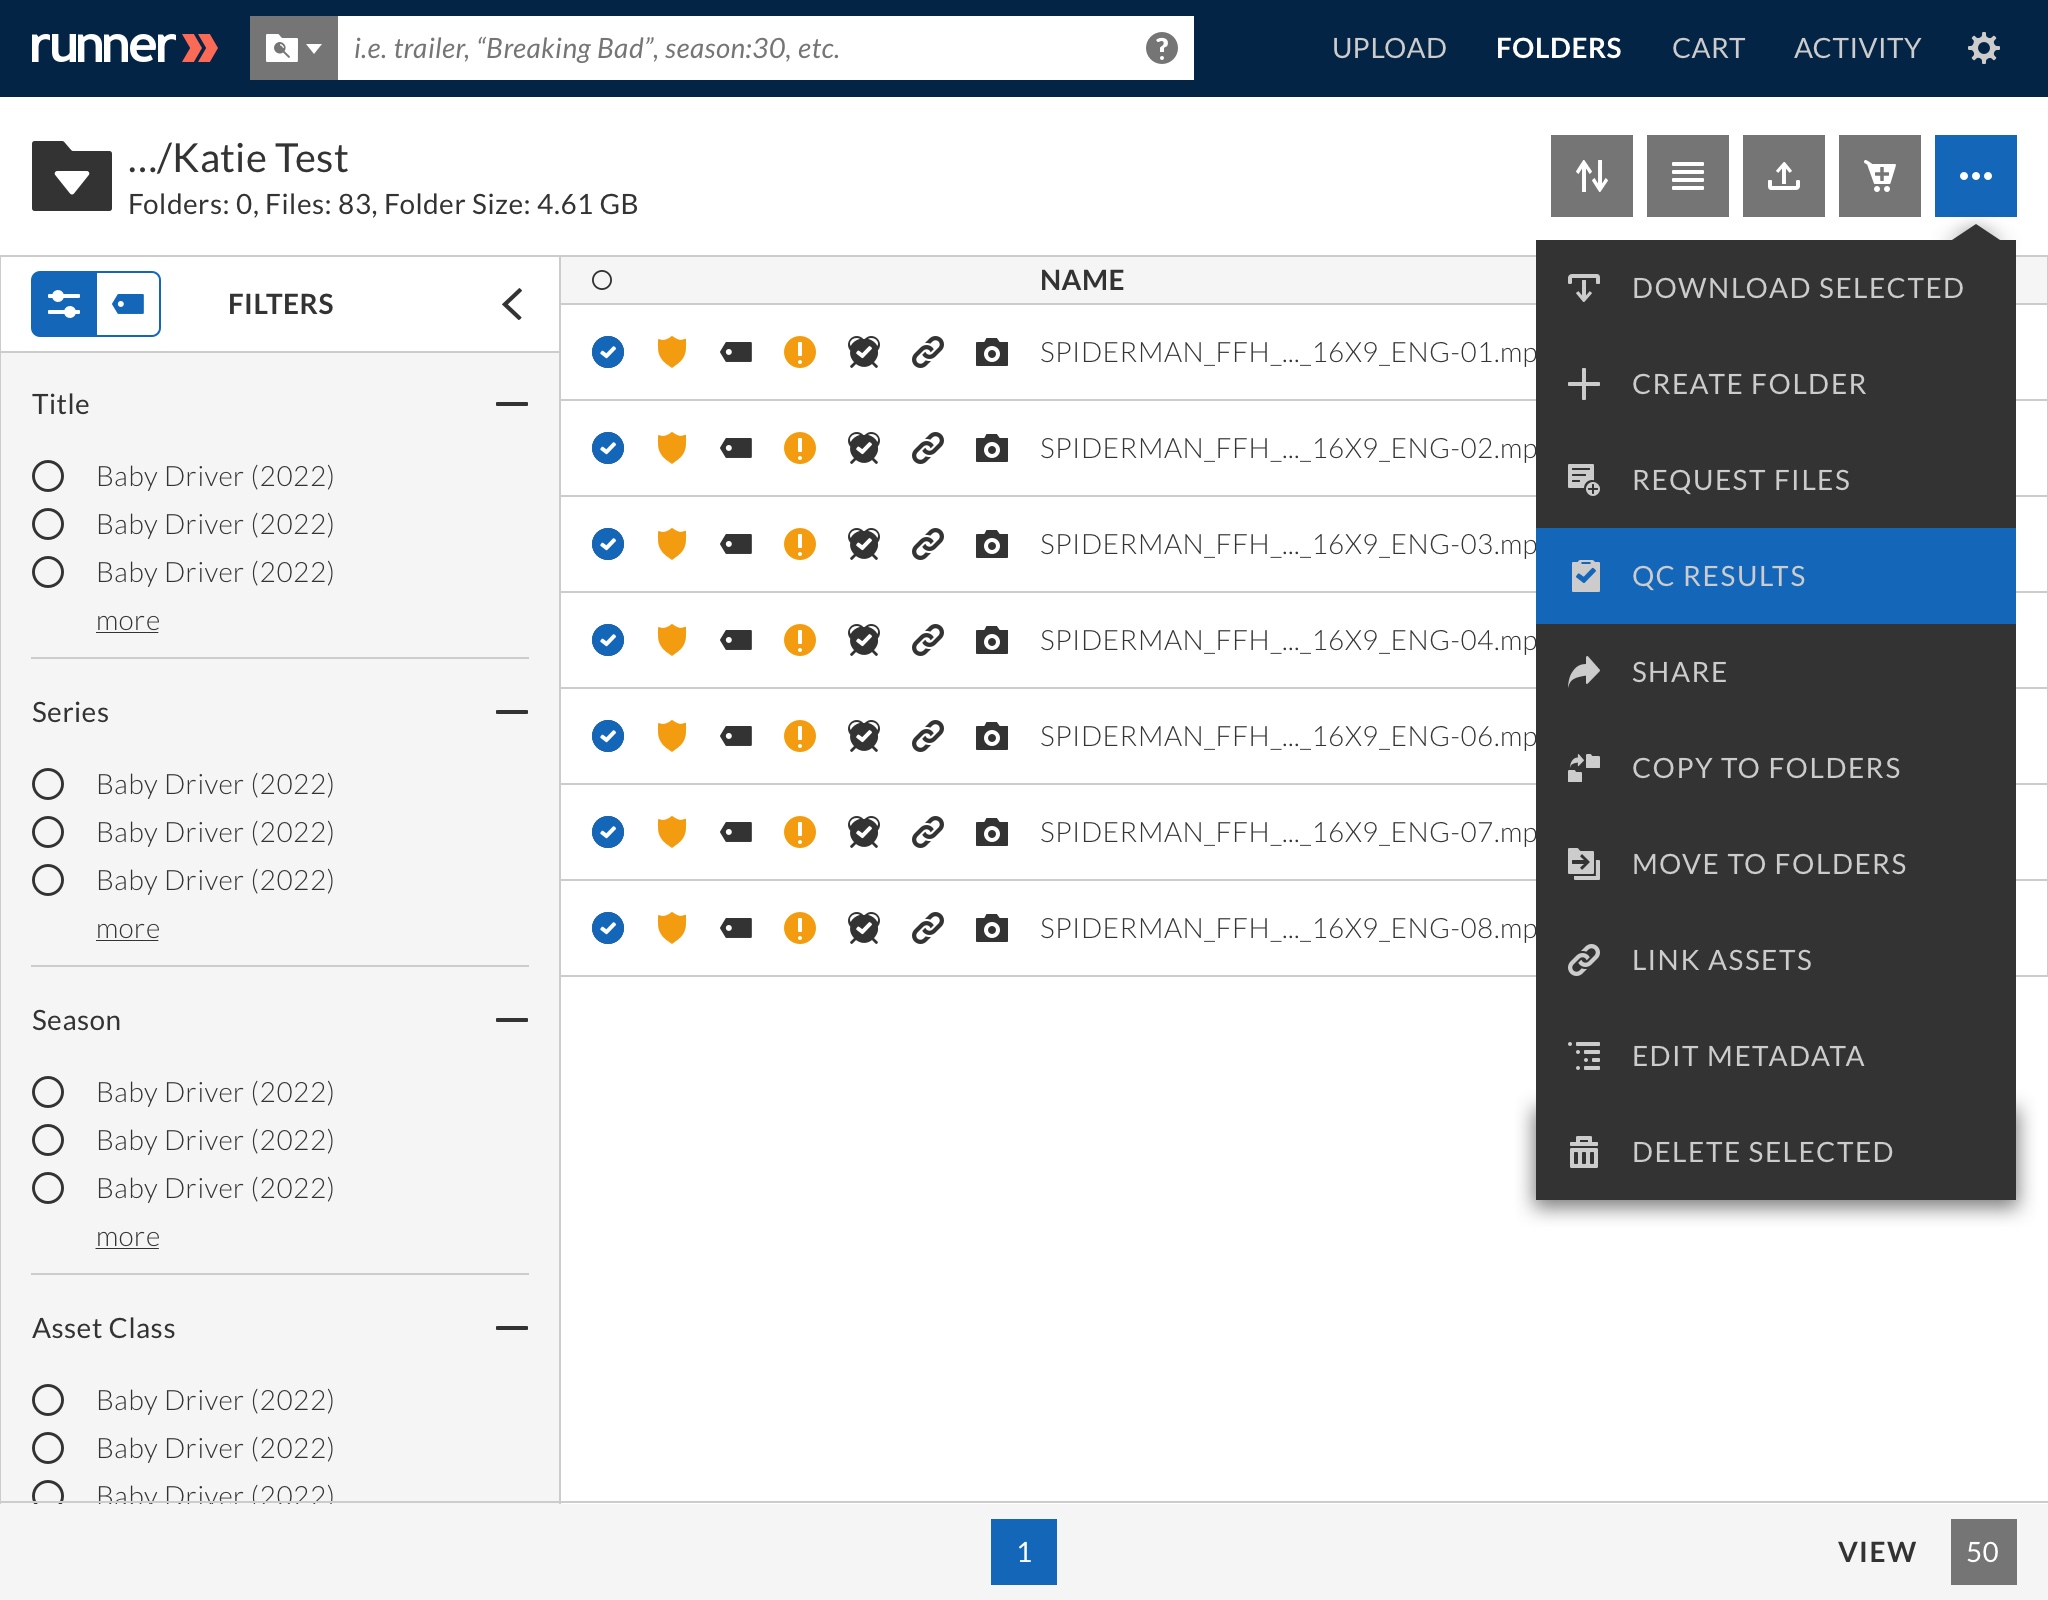
Getting Started: Navigate to a designated folder, click the context menu ![]() , and select ‘QC Results’ from the dropdown.
, and select ‘QC Results’ from the dropdown.
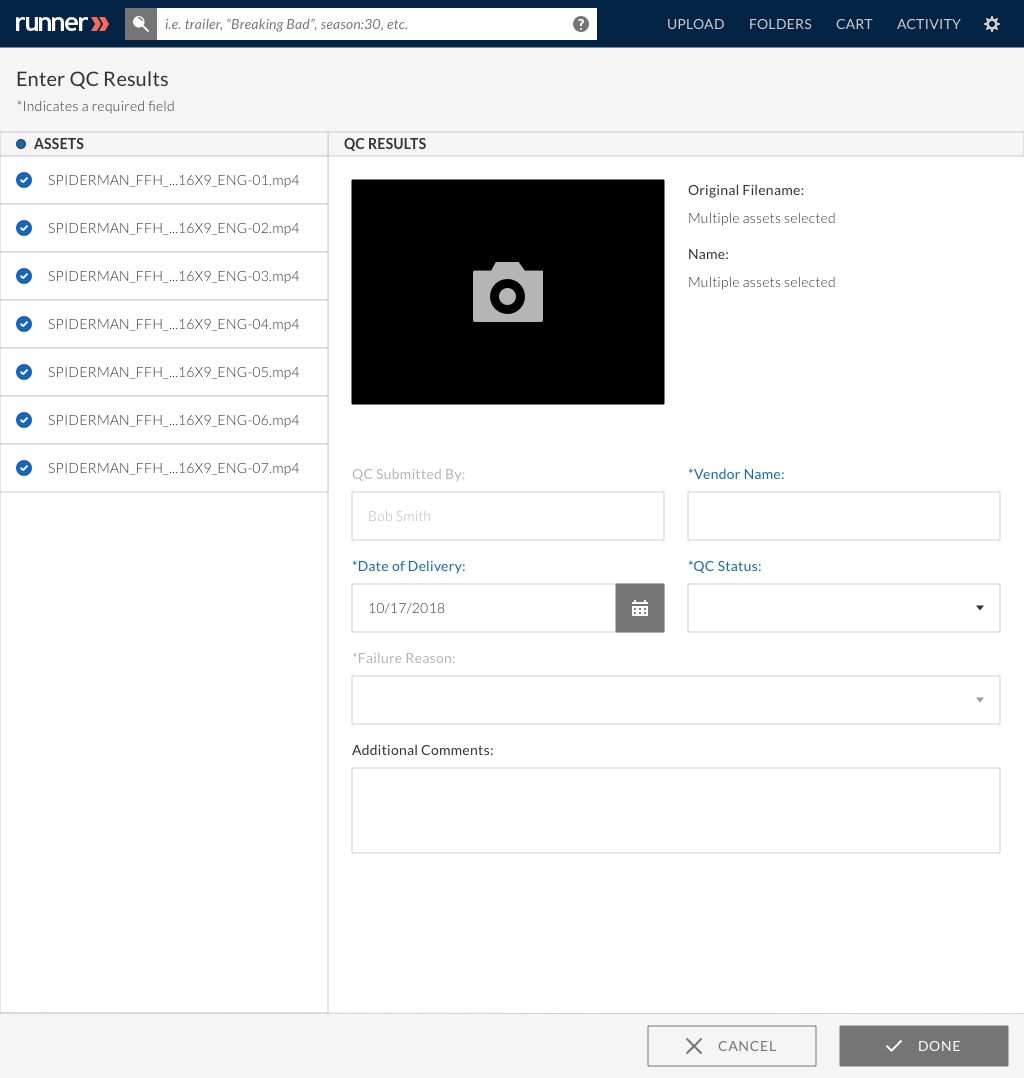
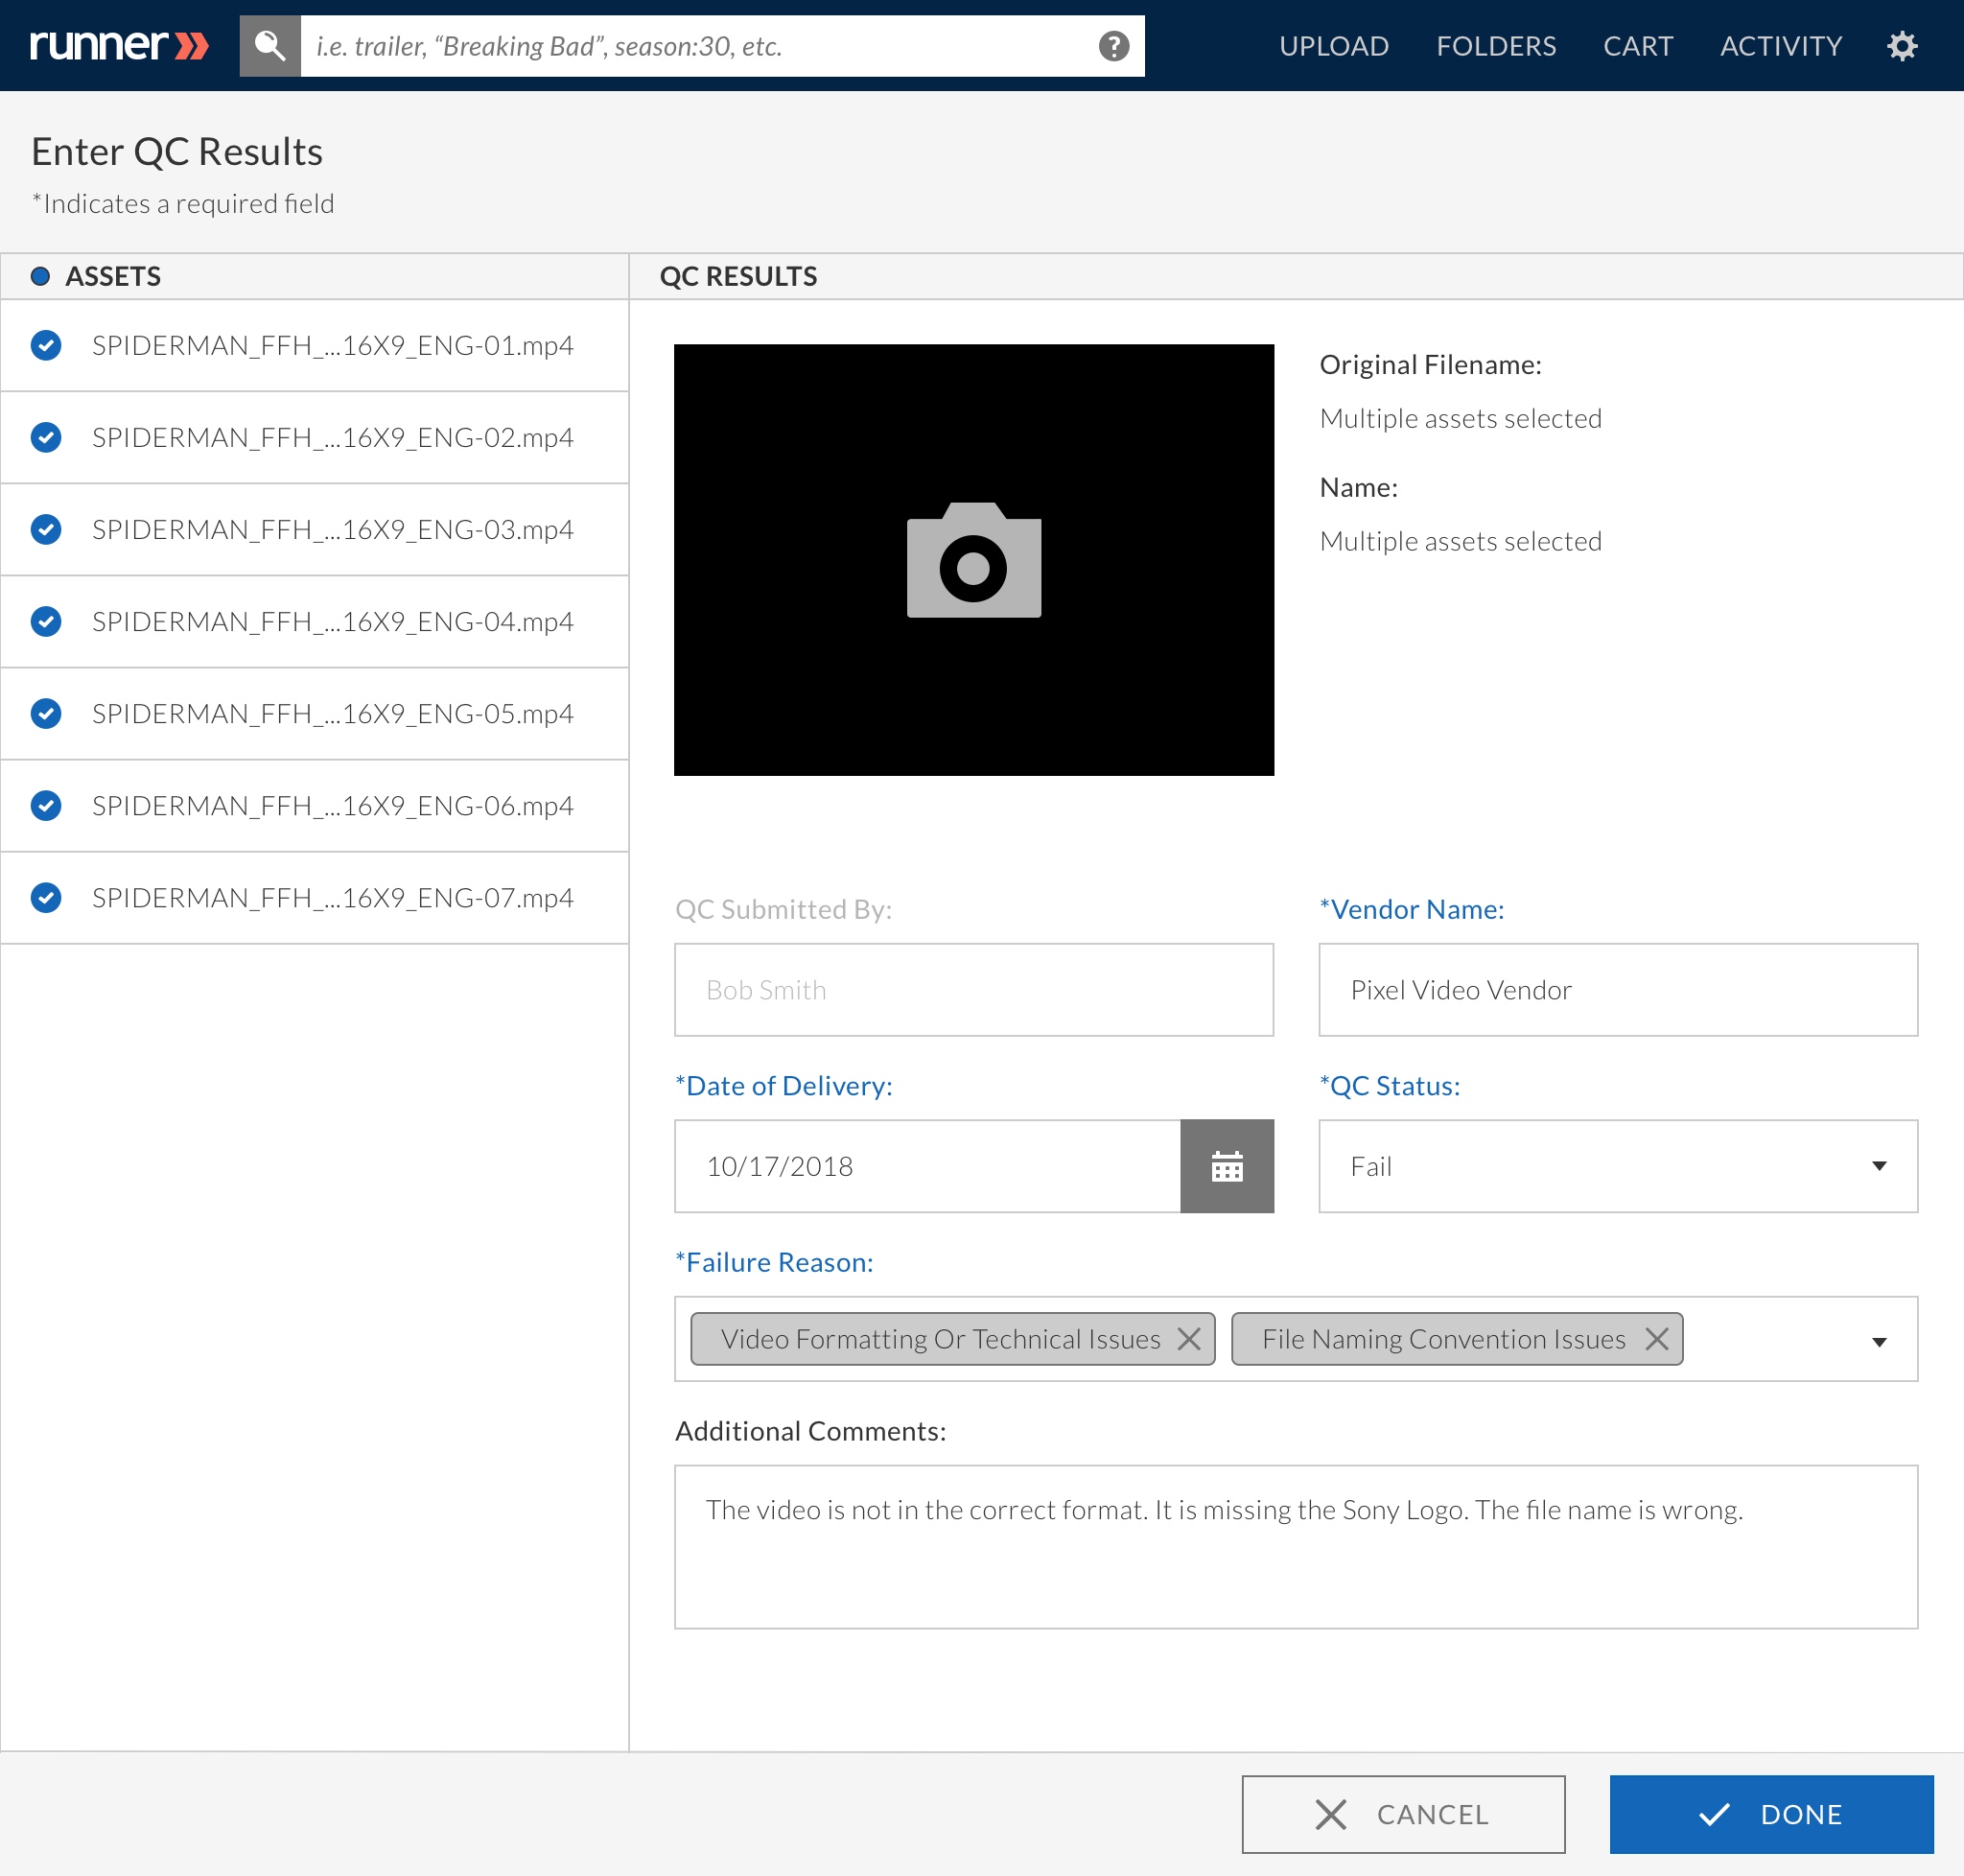
Step 1: Select all assets in the folder using the ‘select all’ bubble.
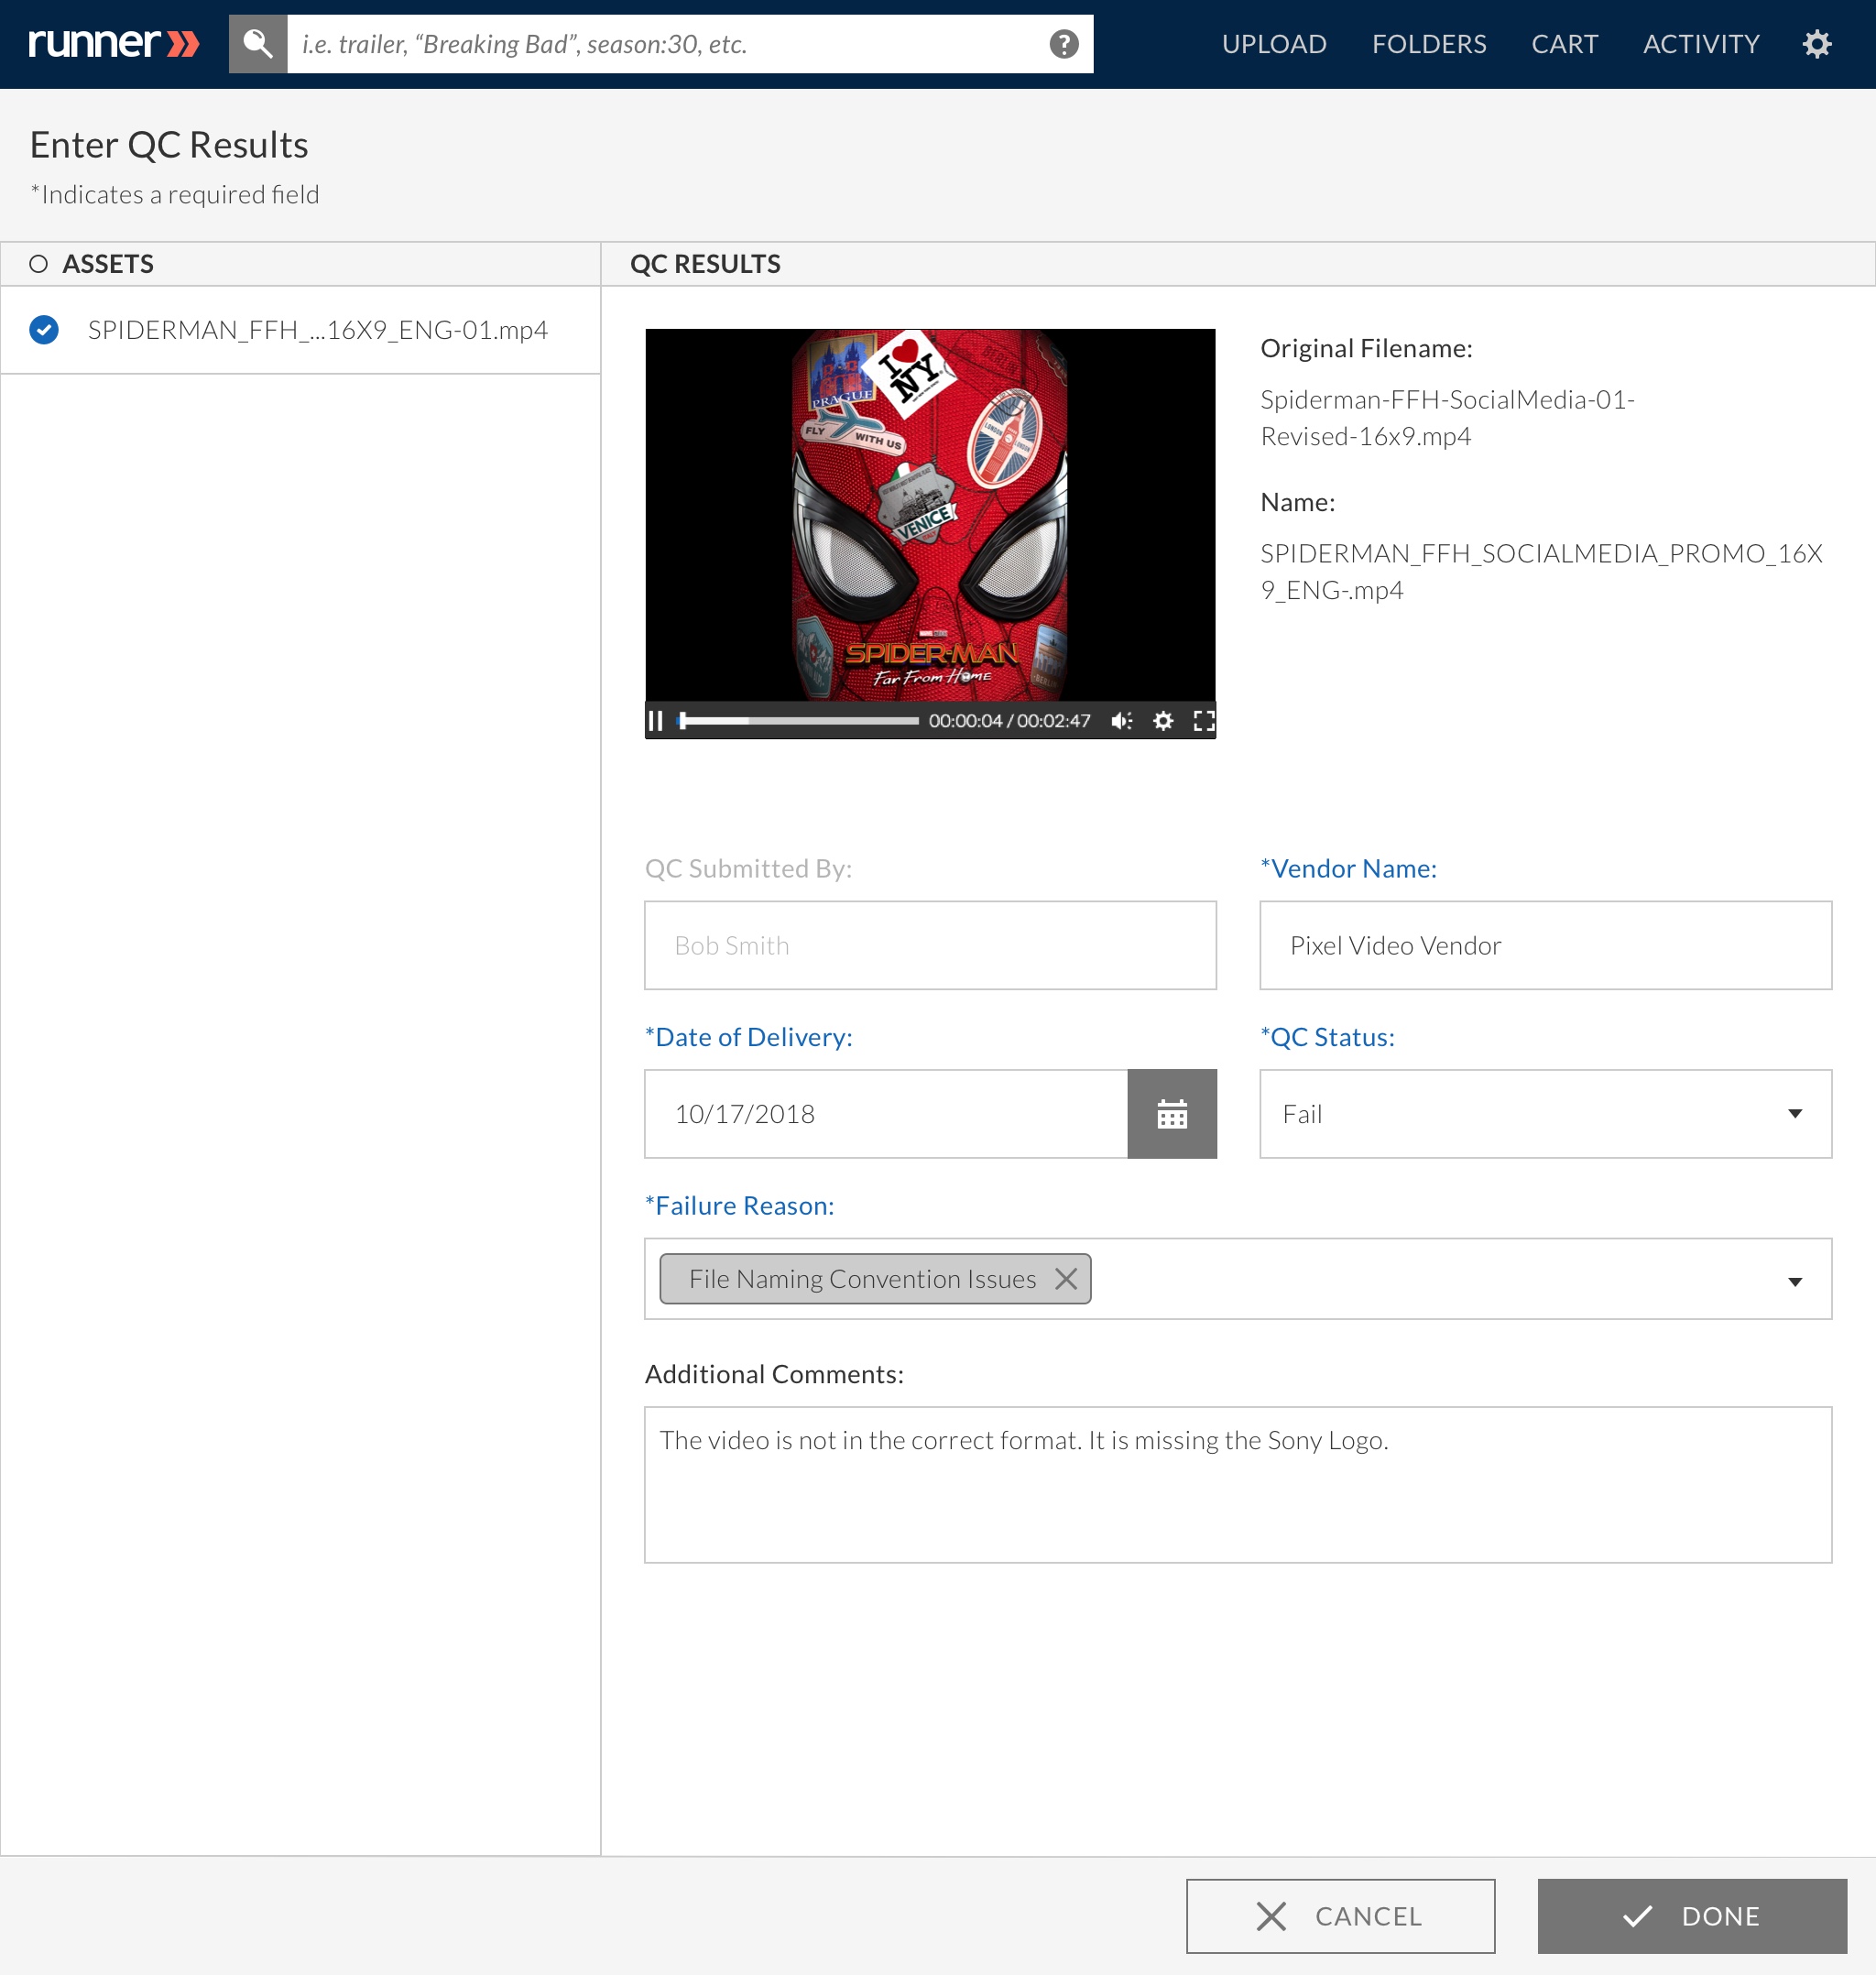
Step 2: Enter all required information in the input fields within the QC report using the dropdowns.
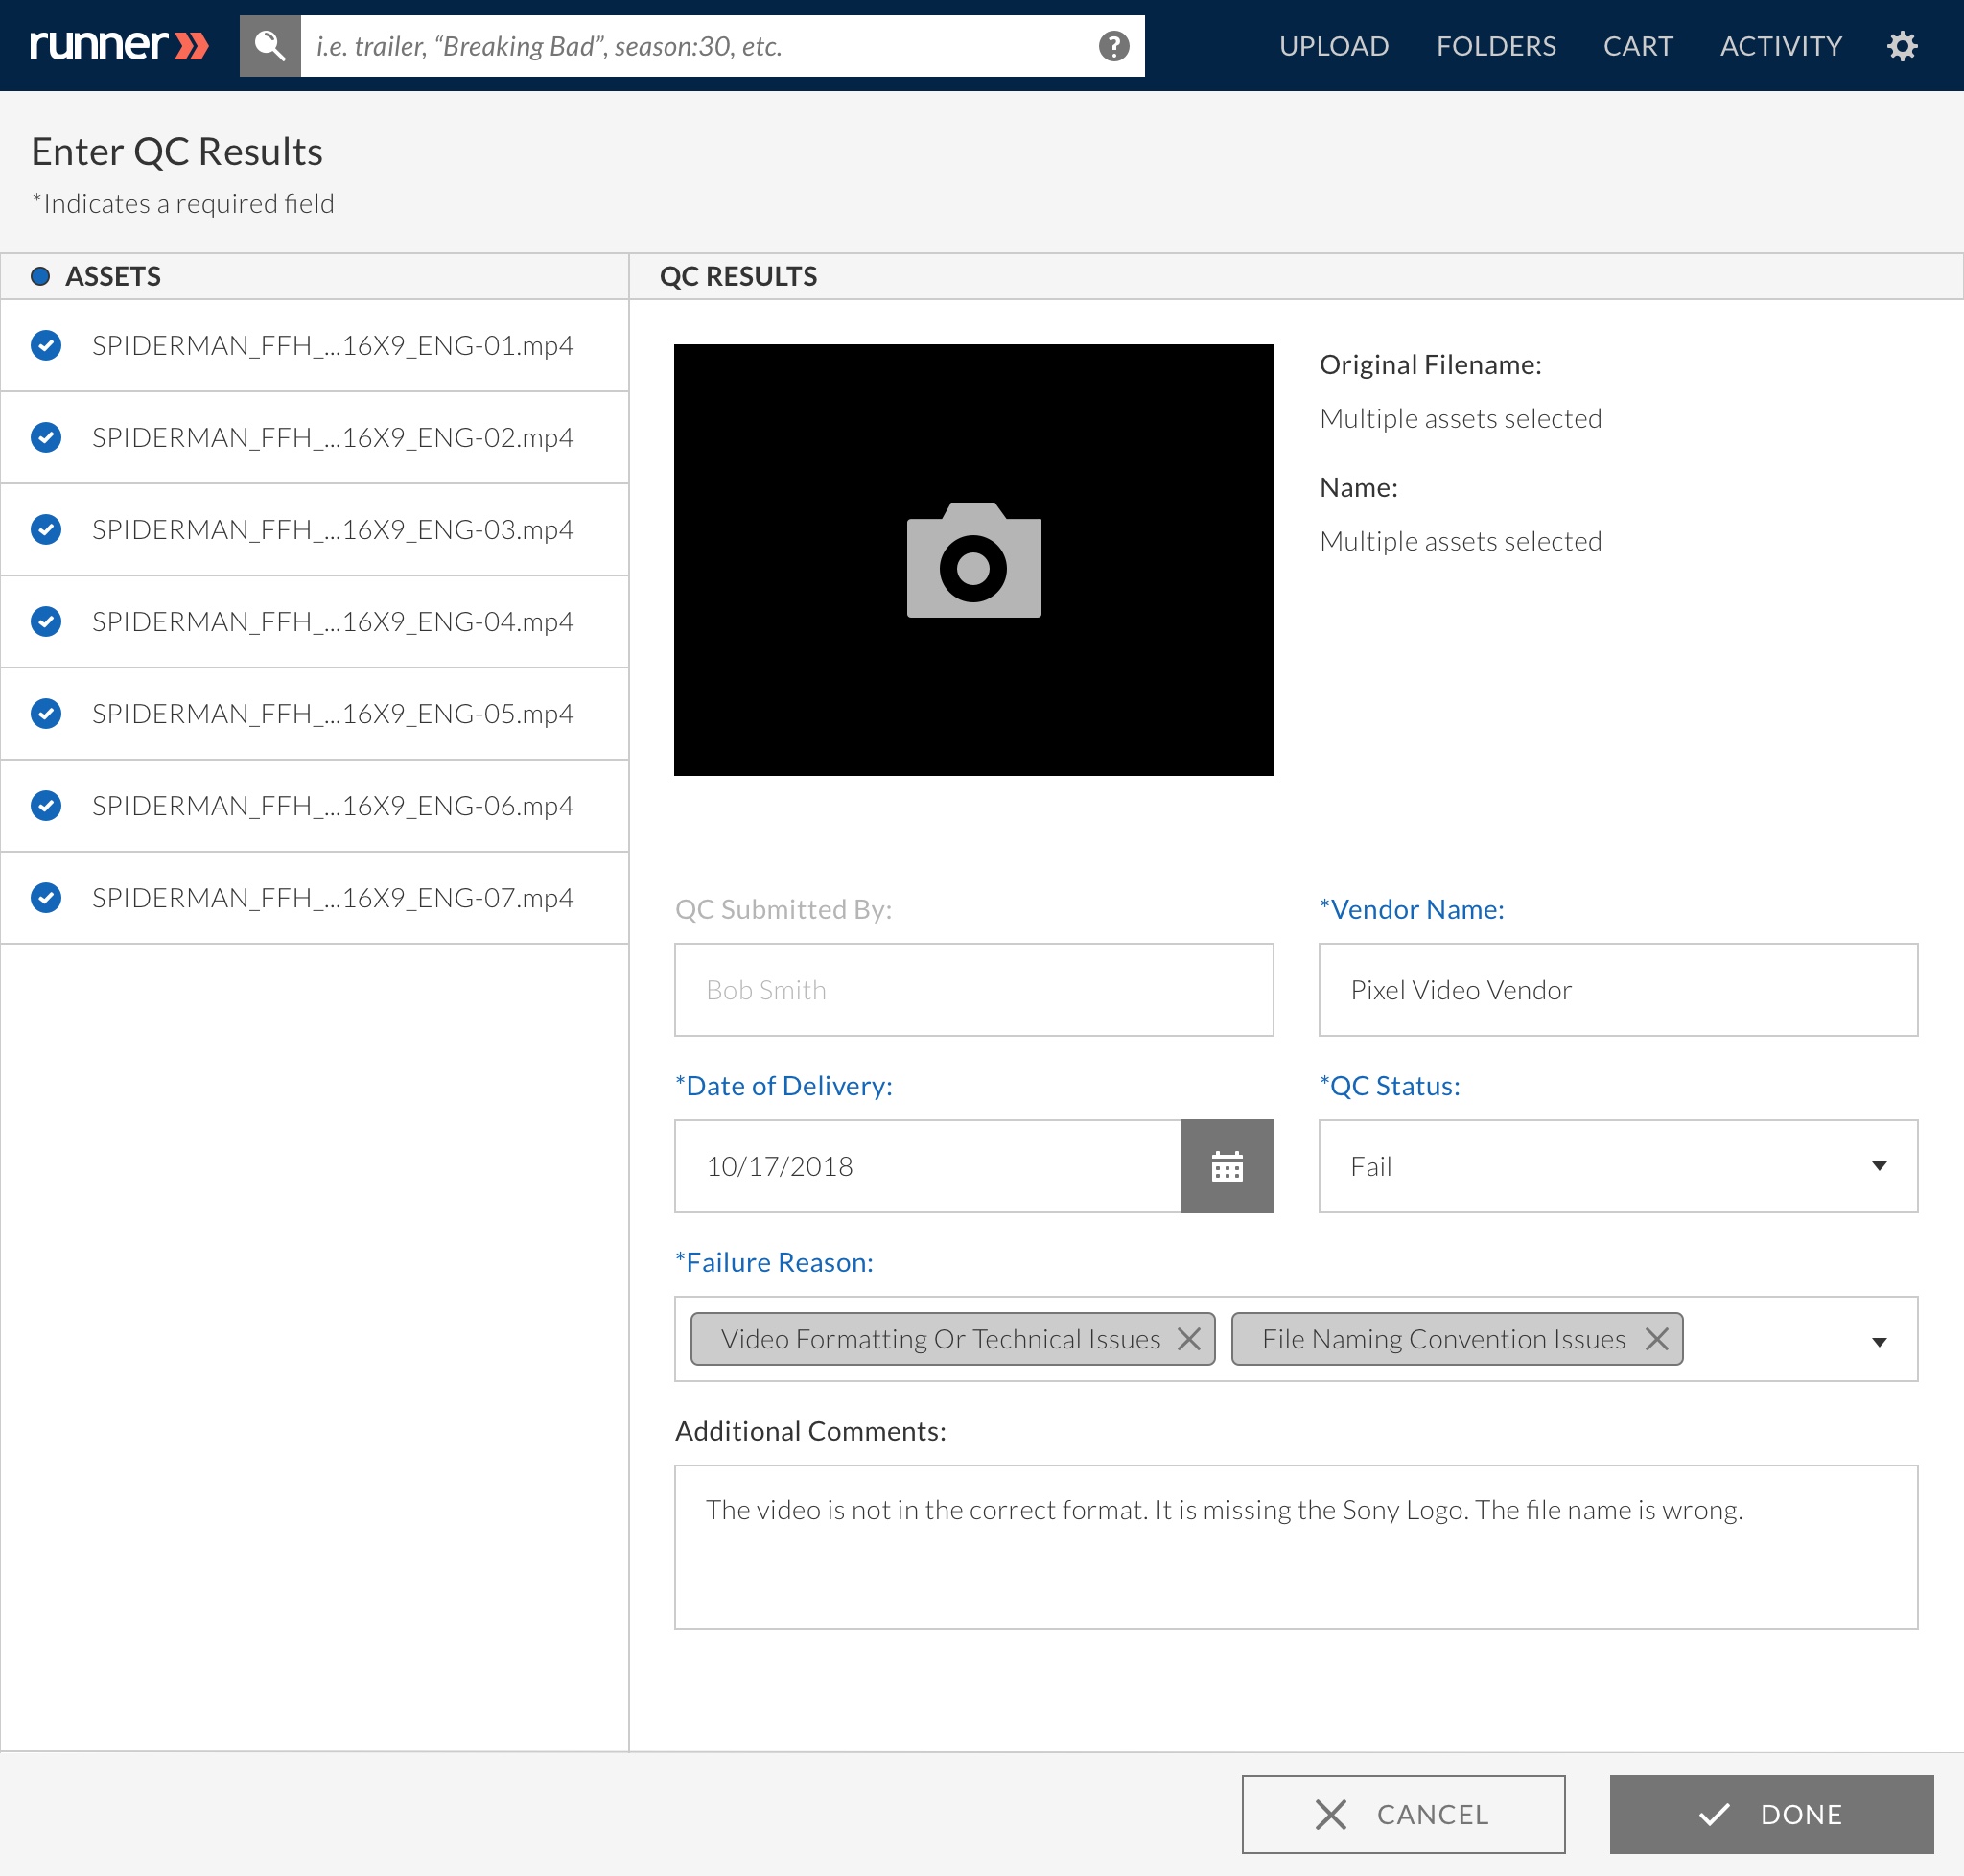
Step 3: Click ‘Done’ when all input fields are correctly filled.
Step 4: Navigate back to an asset with the applied QC report within the designated folder. Scroll down to the bottom of the asset details page to view the QC result.
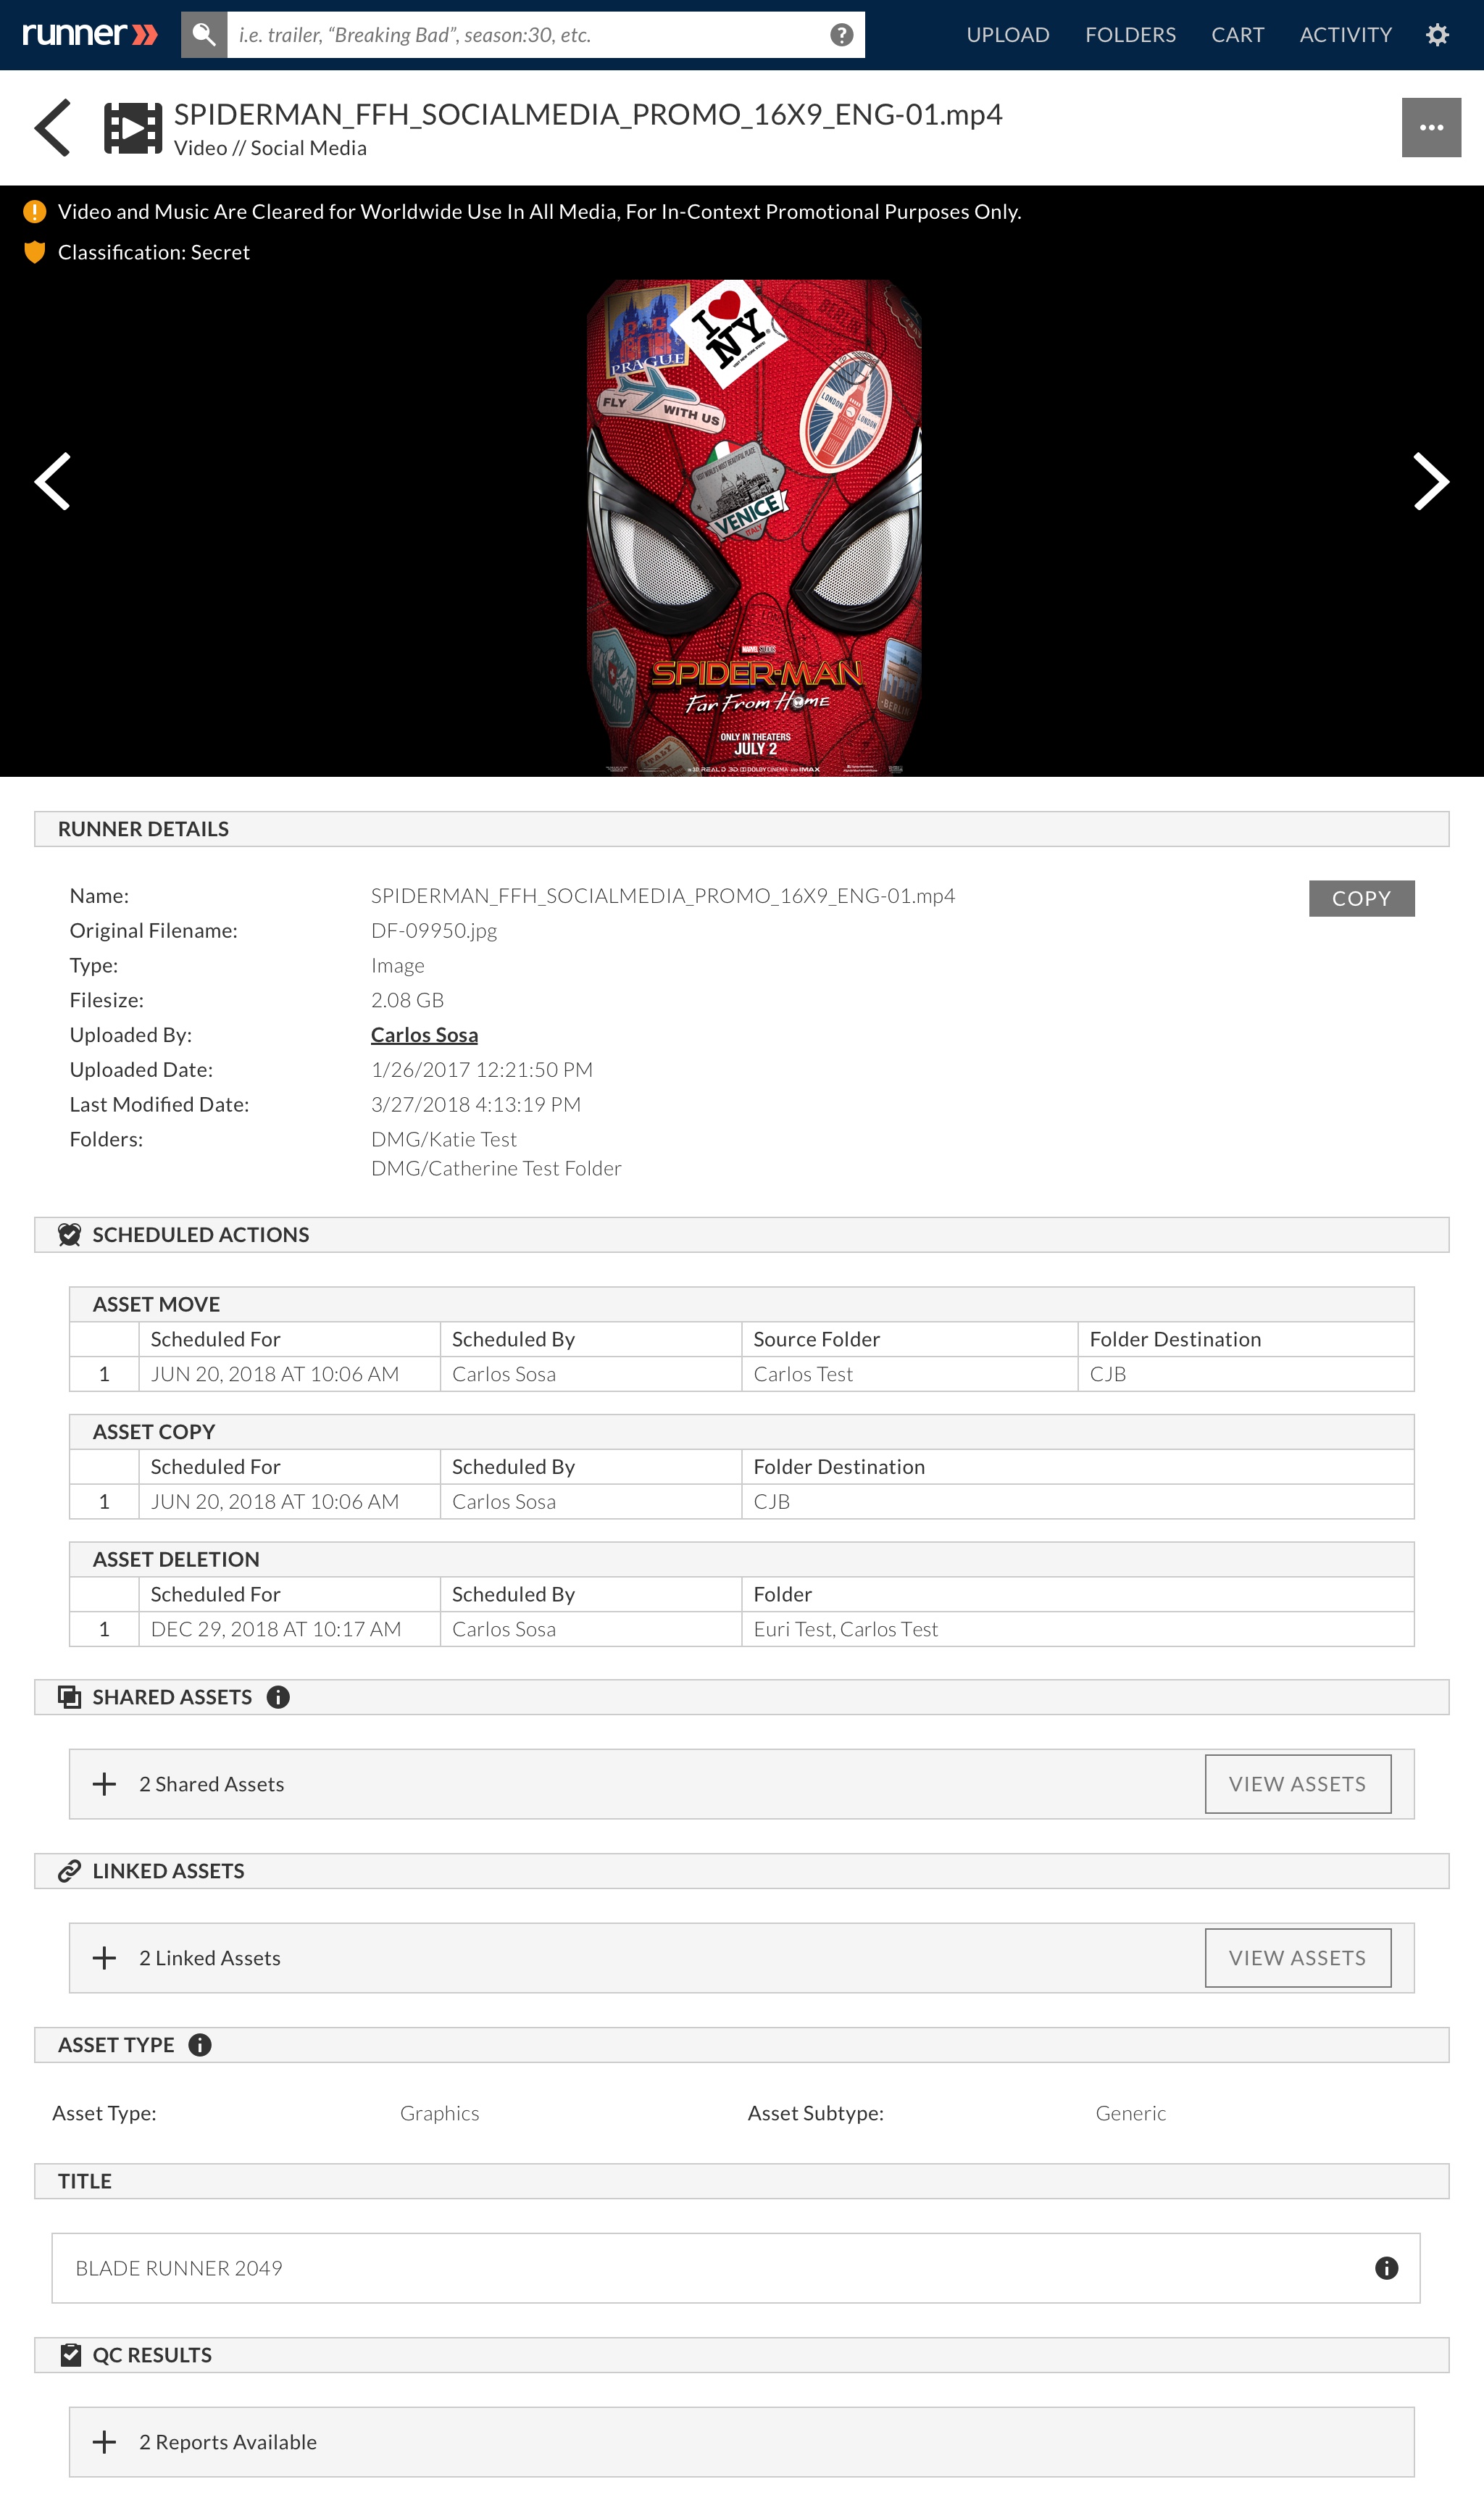
Step 5: Click  to expand or
  to collapse the QC results.
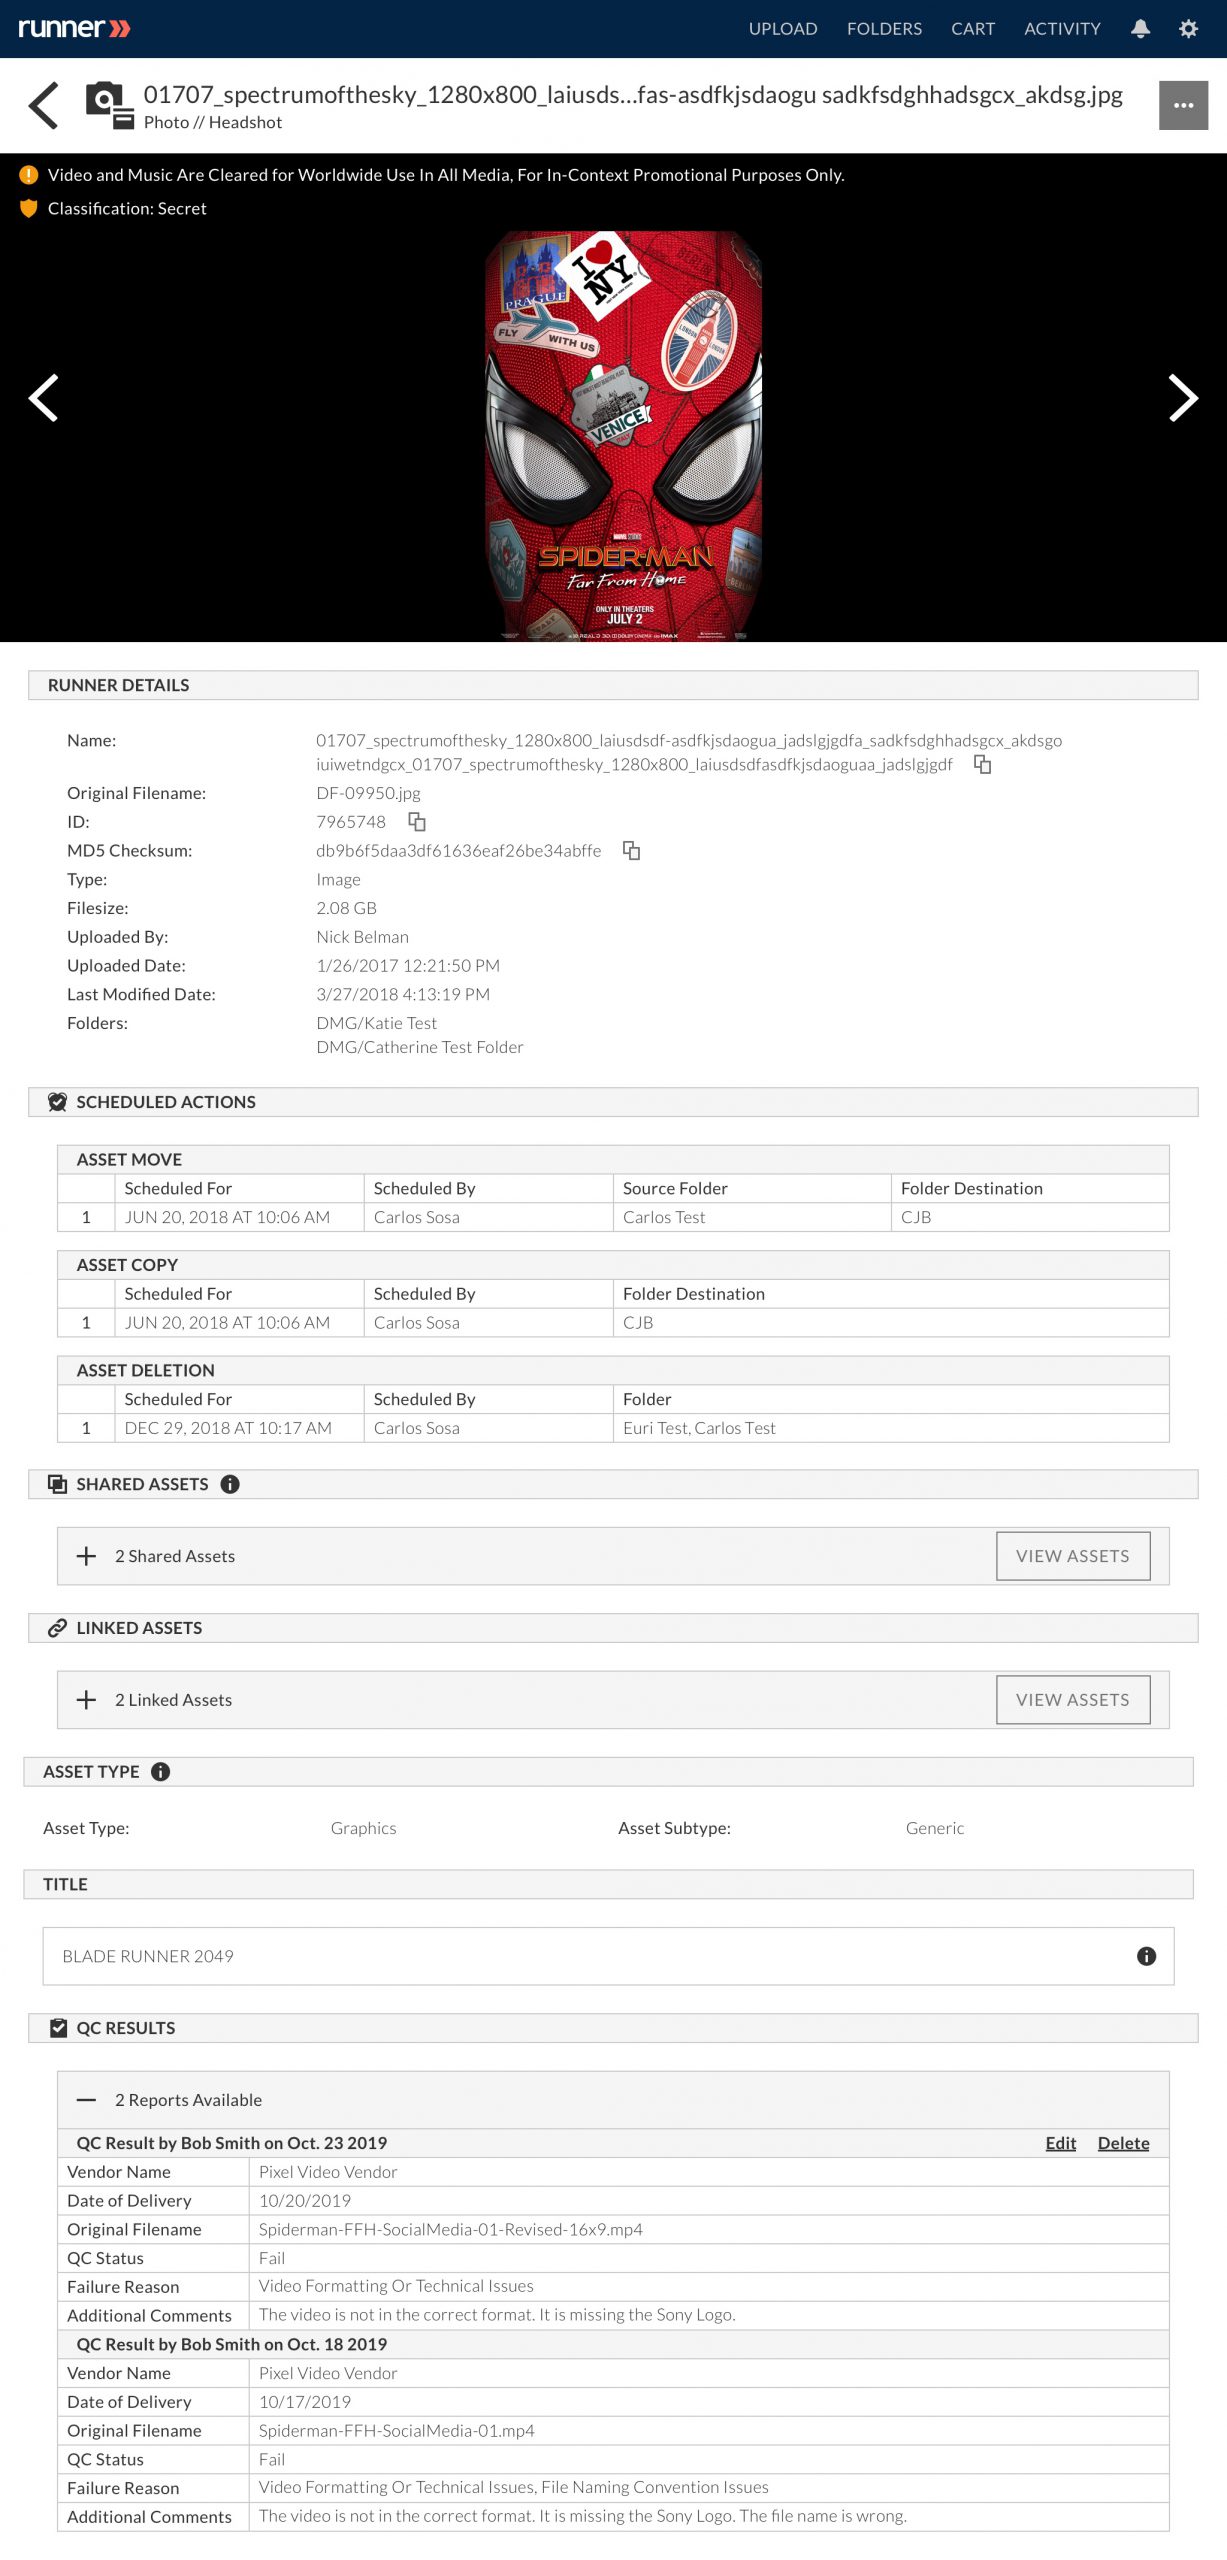
Delete: Select ‘Delete’ on the top right-hand corner of the QC results to delete the QC report for a specific asset and click “Confirm” upon completion.

Edit: Select ‘Edit’ on the top right-hand corner of the QC results to edit the QC report for a specific asset and click “Done” upon completion.